Saturday 28 September 2013

Chard tart

Tarte aux Blettes, sometimes a sweet tart, with a top crust, pine nuts and sugar. This version makes the veg take centre stage. It's got an earthy taste that I love. The stems and leaves are prepared separately, then piled onto a wholemeal shortcrust, and bechamel is spread over the lot. Top that with a mild cheese, and cook in a medium oven. It's great, hot or cold. Oh, lemon zest from one lemon should be grated over the pastry, and other than property and salt, nutmeg is the only other flavouring.

If you wanted, cooked bacon bits or ham could be added.

Salad and steamed potatoes makes it a feast.

Tuesday 24 September 2013

biscotti for an autumn evening - you dictate the season

The autumn sun has just about set, I’m thinking ahead, and tonight I will indulge in an evening tipple, a little brandy perhaps. In my hand I want to see a little hard biscuit. Cantuccini, dipped in a little spirit, with a short coffee. The flavour is light, you can still taste the nuts as well as vanilla and a touch of cinammon. A winning combo, making a proper end to an evening. 

After some experiments I’ve mastered the recipe for cantuccini now. My first batch were definitely the dentist’s friend, requiring serious dunking, in tea coffee or alcohol to avoid that worrying bite and crunch, after which you couldn’t help wondering if there was a nut in your mouth or a fragment of something, that until very recently, had formed part of your dental infrastructure.

All in all, despite this being a two-step recipe, it is worth making the effort. The biscotti, apart from being the only thing in my cupboard with that name that is actually cooked twice, keep for ages, if you can hide them from the greedy. They are not too sweet either.

I have used mixed nuts and favour some brazil nuts and some hazelnuts as an alternative. I don’t want any fruit in there myself, but some people include raisins or apricots (chopped up). You don’t have to peel the almonds either, of course. Time to bake.

Tips:
  • The dough should be sticky but not wet. Eggs vary in size, as does opinion about what large means (thank you, Marks and Spencer). If your dough is not sticking together add a little water, drop by drop. Or you could add some alcohol, it will give the flavour a twist, something without too pungent. Not milk, since this is a fat free recipe, let’s not spoil it.
  • Don’t forget the salt, it makes a big difference, and I try to have fresh baking powder, because baking powder does go off and a poor rise is just depressing.
  • When you take the loaf out It’s worth waiting a while before cutting the first bake of the loaf into slices. I find a very sharp serrated knife works best. I’m also thinking of drying out the almonds a little before starting on this recipe. I skin the almonds by soaking them in boiling water, and that makes them a teeny bit soggy.

Set your oven to Gas Mark 4 (180°C/350°F).

RECIPE

Ingredients:
325g (12oz) plain flour
300g (11oz) caster sugar
1½ tsp. baking powder
½ tsp. ground cinnamon
½ tsp. salt
325g (12oz) whole blanched almonds
3 large eggs
2 tsp. vanilla extract

Method:
  • Prepare two baking sheets with baking parchment.
  • Roughly crush about a third of the almonds (I sometimes use 1/3 almond flour)
  • Mix the dry ingredients: flour, sugar, baking powder, cinnamon, salt and almonds.
  • Whisk the eggs and vanilla together and stir them into the dry ingredients, working it into a stiff dough (I use a fork). If it’s not all sticking together add a few drops of water.
  • Turn the dough out onto a floured board and divide into two.
  • Roll each half into a sausage and divide again into two, so you have four pieces. I do this because it fits on my baking tray, and makes slightly smaller biscotti.
  • Put the sausage shaped dough on the lined trays and flatten a little – they will spread a bit, so keep them well spaced.
  • Bake for about 30 minutes, or until the logs are well risen and have almost doubled in size.
  • Leave the oven on.
  • Cut into slices about 1cm thick. Some people say they should be smaller, but I can’t cut them that small. Don’t worry about leaving space between the slices.
  • Put the sliced dough back and cook for around 20 minutes more, until they are lightly toasted. Let them cool before storing (or eating).


Makes lots.

Monday 23 September 2013

Sunday 22 September 2013

revisiting green sauce with fish

I got such an enthusiastic reception for green sauce yesterday, that I am reprinting the recipe. Last night I added tarragon, so it the combination garlic, coriander, dill, tarragon, capers and gherkins, with about a spoonful of olive oil, a couple of spoonfuls each of maionnaise and greek yoghurt, plenty of pepper and salt. Into the blender and hey presto, joy to eat with potatoes and on this occasion salmon baked in white wine on a bed of tarragon, dill and coriander.

It is hard to describe the flavour, since the ingredients vary. The variety above has a lovely aniseedy undertone. The main thing about green sauce is that it packs a tangy punch, and complements both fish, meat and veg. Give it a go.

this is my original posting:

The green sauce is a grab it sauce in terms of ingredients. I often have parsley, coriander and dill hanging around, and I throw a good handful of each into the blender with a clove of garlic, pepper and salt and blitz the lot. Adding a bit of oil and lemon juice or vinegar gives a lovely dense sauce. Adding assorted pickles (capers, gherkins, jalapenos) adds a vinegary tinge.You can also add maionnaise, and/or yoghurt or creme fraiche. Anchovies may also put in an appearance, to be blitzed. I like to have a smooth base and then add some texture by chopping an onion very finely by hand, sometimes a hard boiled egg might be added. Green sauce is a lovely accompaniment to fish and potatoes. 

Friday 20 September 2013

Chicken risotto with chorizo

Risotto scares people off, as it has the reputation of being difficult to cook. Its true that if it is overcooked it can be like an unwelcome savoury rice pudding. The only thing you need to do is to take it slow. Even going slow, it is a quick meal to prepare, around 30 minutes including peeling, chopping and slicing.

half a packet of sliced chorizo
·         1 chicken breast, sliced
·         Risotto rice - ½ cup per person

·         1 large glass of white wine
·         Olive oil

·         green veg (peas, sliced beans, sliced courgette)
·         Parmesan cheese, finely grated
·         Salt and pepper
·         Two sprigs of fresh rosemary
·         Two tomatoes (tinned is ok)
·         Spoonful of balsamic vinegar
·         Good quality organic chicken stock
·         One red onion, finely chopped
·         2 cloves garlic, sliced
·         Butter

Method

·         Fry the tomatoes in olive oil in a large/deep frying pan, until they are reduced, add the balsamic and set to one side
·         Put a couple of tablespoonfuls of olive oil on the hob, and add sliced garlic, chopped red onion, and the rest of the rosemary
·         Add sliced chorizo and chicken, and continue to cook for five minutes, stirring
·         Once the chicken has started to colour and the oils are seeping out of the chorizo, add rice, frying at a medium temperature for a couple of minutes
·         Add the wine, keeping the temperature bring the wine to a simmer
·         Now start adding the chicken stock, a small amount at a time, but keeping the ingredients just covered beneath the stock
·         Cook the rice for about fifteen - twenty minutes, stirring all the time
·         After ten minutes add the veg, stirring into the risotto, so it cooks properly
·         Keep checking the rice, it is cooked when the rice is firm but not hard
·         Stir in the tomatoes, season and add the parmesan

Let the risotto sit for a few minutes.


Eat with some nice peppery lettuce leaves

Thursday 19 September 2013

Couldn't be resisted

From aroma to knife to plate.

Apple coconut cake - great as a pudding

Apple and coconut cake
·         175g unsalted butter, softened
·         175g golden caster sugar
·         225g self-raising flour, sifted
·         1tsp baking powder
·         2 eggs, beaten
·         1tsp vanilla extract
·         ½tsp ground cinnamon
·         4 tablespoons milk
·         2 cups apple chopped and peeled (2 large apples)
·         100g dessicated coconut


Topping
·         2tbsp Demerara sugar
·         2tbsp desiccated coconut
·         ½ tsp cinnamon
Pre-heat the oven to 180° C

Method
·         Grease and line round 8 inch/20cm springform cake tin with parchment paper
·         Stir together flour, coconut and cinnamon 
·         In separate bowl stir together the topping ingredients
·         Cream together together the butter, sugar and vanilla extract until light and fluffy
·         Beat in the eggs, one at a time, mixing as you go
·         Fold in the flour, baking powder, cinnamon and milk until incorporated, then add the chunks of apple and 75g of desiccated coconut, mixing well.
·         Spoon into the prepared cake tin, and level off with the back of a wet tablespoon
·         Sprinkle over the topping mixture
·         Bake for 40-50m until a cake tester comes out clean when inserted into the centre
·         Remove from the oven and allow to cool in the tin for 10 minutes before turning out to cool completely on a wire rack
·         Cut with very sharp knife

The larger the apple chunks the more likely the cake will fall apart easily. This does not affect the taste.

1kg coconut to use up

A kilo of dessicated coconut is a lot of coconut, even if you are very keen on coconut. I have no idea why I bought such a big bag. It is about half empty, and the best before date is two weeks away. So the race is on. So far apple and coconut cake and coconut shortbreads are on the menu, the cake is in the oven. I've tweaked it of course. The apples are bramleys, there is more coconut, some milk instead of yoghurt, and some creamed coconut for good measure. Also some topping.

going to need a sharp knife to cut this... and friends over

Sunday 8 September 2013

Butternut heaven - vegan supper

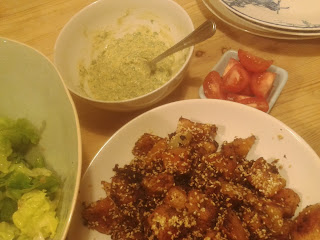
green salad, roasted butternut squash with sesame seeds, pimped houmous, tomatoes, so good I photographed it... four more times

Saturday 7 September 2013

hesitant cook - easy marinaded chicken

Having a chat with a friend, I found out she didn't have the confidence to cook from scratch. Since cooking is something I do to relax and love doing, this made me sad. And my greedy self felt sad too.

Watching the television, even reading recipes in papers and magazines, you might think that there were only two kinds of people: those who can cook, and those who can't. However, it's not true. Everyone can cook. Some people may find it easier than others, but anyone can cook, if they have the right information, some simple equipment and the right ingredients. Even experienced and confident cooks with every type of gizmo can have a disaster in the kitchen. I love cabbage, I should be able to cook it by now, yet I remind myself how easy it is to burn it at least once every few months, and have to rediscover the horror and delight of scouring pans as a result, or event throw away a pan. Bicarb is a great hero saving many a burnt pan.

So, if you are prepared to risk trying the recipe of a cabbage-burner, I would like to suggest a simple method to make chicken. Marinade it. Let pieces of chicken soak in a prepared sauce for at least 20 minutes, and then fry them in a pan. Boneless chicken cut into bite size pieces. If you use chicken on the bone, or larger pieces, prick them all over with a fork, or slash them with a knife, so that the marinade soaks right in.

You can make a marinade with ketchup, vinegar and olive oil, or yoghurt, lemon and oil. Include pepper and salt and pep it up with herbs, chilli, ginger, curry paste. Writing recipes is like being a dictator, and I don't want to dictate here, because I would like you, my fellow cook, to do your own thing, to be your own dictator and creator.

To cook, get a frying pan nice and hot, put some oil in and fry, the chicken fast, or cook under a hot grill, a couple of minutes each side for small pieces, five minutes for each side with larger pieces. I know that people like crispy skin, however, I would suggest putting your chicken into a bown and putting a plate on top, and letting the chicken rest. It keeps the chicken moist, and makes it more flavoursome..

Wednesday 4 September 2013

biscuits on a hot day - choc chip and wholemeal?


Despite the Great British Bake Off being back on the TV for a whole week, there has been a dearth of baking in this house. With Kitty's first day back at school, there is a call for biscuits, so I am revisiting this recipe, and I'm going to mess with it.

Although many of us hanker for one of those chewy chocolate chip cookies you see in speciality cookie shops as we nurse a cup of tea at home, somehow when you have them to hand, or you follow the chewy chocolate chip cookie recipes those biscuits deliver too powerful a sugary hit. Even when eaten with coffee. Hence the logic of adding wholemeal flour, and some milk powder. Why milk powder? Because it adds a bit of chewy without too much extra sweetness, after all, some biscuits use condensed milk. Also the powdered stuff is easy to store and doesn't add liquid to the mix.

So, the questions fly, how to get an even biscuit in terms of mix and measure? I like this mixture, which is quite easy to handle, even with two spoons. I have yet to buy myself an ice cream scoop, but I think it might be the way to go. I saw someone using one for biscuit mixture, dolloping out even mounds, and I have to concur: the logic is good. The scoop works for ice cream, it works for the more solid mash, and it works well for biscuit mix. Alright, cookie dough, if you insist on going all American. Add scoop to the shopping list.

Set the oven to Gas Mark 4/350F/180C and line several baking sheets with baking parchment.

Ingredients
  • 150g butter
  • 50g vanilla caster sugar approx. 2 tbsp
  • 90g soft brown sugar approx. 3 tbsp
  • 1 egg
  • vanilla essence
  • 100g plain white flour
  • 75g plain wholemeal flour
  • 2tbsp powdered milk
  • 1/2 tsp bicarbonate of soda
  • 150g plain chocolate chopped into pieces – I like them the size of a large square pea


Method
  1. Beat together the butter and the sugars, adding the vanilla essence.
  2. Beat in the egg.
  3. Add the flour and keep beating.
  4. Add the chocolate pieces.
  5. Use two spoons and drop large teaspoonsful of mixture onto the sheet, allowing plenty of room to spread. 

Cook for around 15 minutes, or until golden brown. Allow to cool before removing from baking sheet, or you may lose most of the chocolate.

Makes around 18 large biscuits.
the chocolate chunks are still warm...


Choc chip

Picture these on the plate fresh from the oven. Guess what? They include wholemeal flour.

Tuesday 3 September 2013

last gasp picnic

I learnt my picnic technique from my mother, who could prepare a hamper with a whole salmon and all the trimmings to feed 10, throw together a sandwich or knock up a fire on a beach and cook sausages. It helps to have the right gear, but the main ingredient necessary is being up for it.

Yesterday the local festival, here in the cultural centre of the world, Cricklewood, had scheduled an outdoor showing of Some Like It Hot in a park on the dark side (Barnet). Hurray for the Cricklewood Silk Road Festival. Outdoor viewing said picnic to me. So I started getting the picnic kit together, and decided on the menu: chicken and salad wraps with cider to wash them down.

The chicken was marinaded for a few hours and then thrown on the griddle. It cooked beautifully, but left me wishing that I'd spared my clean hob and grilled it instead, letting the oven take the flack. I finally cooked some of the lovely looking split peas I have had for a while, to make a herby salad, and the mayo in the jar was going to get a makeover with paprika and friends. Add some rocket and a wrap, and napkins would be needed to catch the drips and wipe the mouth while it was being devoured.

What else do you need for a picnic? Leaving aside the hordes of helpers to carry the full dining table, crockery and chandelier, I prefer not to do disposable. This the gear I go for:


  • a drying up cloth (tea towel to some) with cutlery rolled into it: sharpish knife, spreading knife and spoons
  • duralex glasses or other almost unbreakable glasses, in another cloth, to prevent cracking
  • picnic blanket, such as bedspread or a couple of sheets. 
  • cold bag or box with ice, camping cold pack or my preferred version, a not quit full plastic bottle of water - if it's full it cracks btw. And maybe some ice to throw into a drink as well.
  • food
  • drink
  • something warm to wear in case the weather changes
So this is a cookery blog, let us consider the food prep. 

Chicken with basil and parsley marinade

Ingredients:
  • Chicken pieces - I cut up a whole chicken following this video , but cutting it into eight pieces
Marinade
  • 1 clove garlic
  • small bunch of basil
  • small bunch of parsley
  • juice of 1 lemon
  • olive oil
  • glug of cider
  • pepper and salt
  1. blitz the garlic, basil, parsley and lemon juice together, or chop the dry ingredients finely and then add the liquid and seasoning
  2. mix with the chicken pieces and leave for a few hours - to speed things up you can slash the pieces to help the marinade penetrate
  3. to cook grill or griddle all the pieces until both sides are well browned, about 5m a side

Maionnaise with additions - I like to add paprika, garlic, lots of pepper, lemon and olive oil to bottled mayo, to give it a kick. This salad is refreshing and not too heavy, the peas should be firm but not at all hard, and they keep a lovely green colour. The herbs and lemon lift the flavour.

split pea salad
  • small bowl of split peas
  • handful of each: mint, parsley, coriander
  • 1 clove garlic
  • two tomatoes
  • half an onion
  • pepper
  • salt
  • lemon juice
  • olive oil
  1. cook the split peas in boiling water, it takes about 20 minutes
  2. deseed the tomatoes and dice the flesh
  3. finely chop all the herbs, onion and garlic
  4. drain the cooked peas - they should still be firm - and mix in the herb mixture, and leave to cool
  5. add chopped tomatoes, then pepper, salt, lemon juice and olive oil to taste
For the wrap, I start with a smear of the spiced up mayo, add rocket, pea salad and bits of chicken, and then I roll the lot up, carefully folding one end. Don't think it won't drip, because it will.